Building a Barndominium Under $250k
If you’ve been scrolling barndominium photos on Facebook and Pinterest, it’s easy to assume every build costs $500k+. Huge great rooms, giant shops, dream kitchens… the numbers add up fast. But here’s the truth a lot of people don’t hear:
Buckeye Plans
11/28/20255 min read
But here’s the truth a lot of people don’t hear:
With smart design and a realistic game plan, a barndominium under $250,000 is still possible in many parts of the country.
It won’t be a 4,000 sq ft mansion with a 60x80 shop and all the upgrades—but it can be a beautiful, comfortable, forever home if you’re intentional from day one.
Let’s walk through how to make that budget work.
Step 1: Think In Cost Per Square Foot (Not Just Total Price)
When you say “I want to stay under $250k,” what you’re really saying is:
“I need to keep my cost per square foot in check.”
If your all-in cost lands around $150–$175 per sq ft (which is still very realistic in a lot of markets), here’s what that looks like:
At $150/sqft → $250,000 ≈ 1,666 sq ft
At $175/sqft → $250,000 ≈ 1,428 sq ft
At $200/sqft → $250,000 ≈ 1,250 sq ft
So for most buyers trying to stay under $250k, the sweet spot is:
🔹 1,250–1,700 sq ft of heated living space
You can absolutely work a small office, 2–3 bedrooms, and 2 baths into that range with a smart barndominium plan.
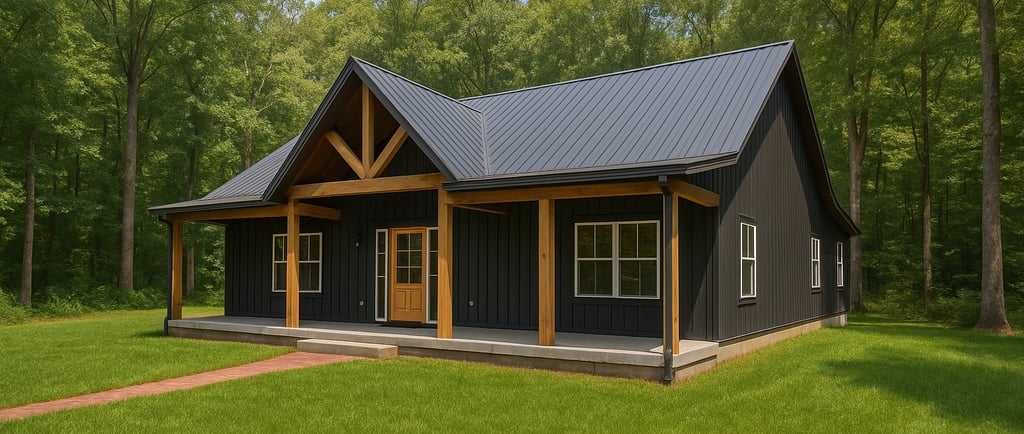
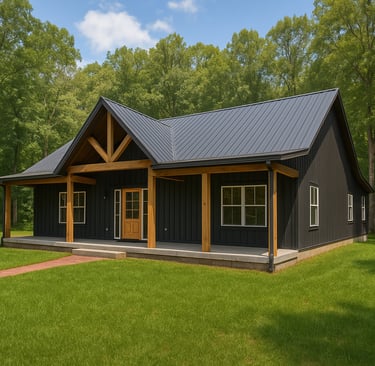
Step 2: Choose the Right Layout for a Budget Build
Shape = money. The more twists, jogs, bump-outs, and complicated roofs a house has, the more it costs.
For a sub-$250k barndominium budget, focus on:
✅ Simple rectangle or L-shape
✅ Minimal roof changes and valleys
✅ One main ridge line if possible
✅ No crazy bump-outs that complicate framing
Great layouts for this budget:
3 bed / 2 bath / 1,400–1,600 sq ft
2 bed + office / 2 bath / 1,300–1,500 sq ft
Small front or rear porch instead of full wrap-around
When you’re browsing plans (including Buckeye Plans designs), look for:
One main open living/kitchen/dining space
Bedrooms grouped together to simplify plumbing runs
Laundry close to kitchen or main bath (less plumbing = less cost)
You don’t have to give up charm—you just keep the structure simple and let the finishes and details bring the character.
Step 3: Be Strategic About the Shop & Garage
This is where a lot of barndominium budgets blow up.
Everyone wants:
40x60 shop
RV bay
Extra storage
Maybe another bay “just in case”
Those square feet add up fast.
If your top priority is staying under $250k, think about:
Smaller attached garage (or even a simple 2-bay)
Future expansion: pour an extra pad now, enclose it later when budget allows
Detaching the shop: sometimes a simple detached pole barn or carport down the road is cheaper than trying to cram everything into the first build
A smart compromise:
Build the house right now and design your site so adding a shop later is easy—same driveway, same general pad area, future power run planned.
Step 4: Finish Smart on the Inside
Inside finishes can easily swing your project tens of thousands of dollars either direction.
To keep your barndominium under $250k, consider:
Flooring
Durable vinyl plank instead of hardwood
Stained and sealed concrete in some areas can be both beautiful and budget-friendly
Kitchen
Simple cabinet layout (fewer corners = cheaper)
Shave down the island size if it’s getting out of hand
One nice “wow” element—like a wood hood or a statement light—rather than blowing the budget on every surface
Bathrooms
Fewer tiled showers = big savings
One fully tiled master shower, secondary bath with a nice tub/shower unit
Ceiling Heights
Vaulted ceilings in one main space (like the living room)
Standard 8'–9' ceilings elsewhere to keep costs more reasonable
You’ll still get the barndominium feel—open space, tall ceilings, lots of windows—but you’re not paying for volume you don’t use in every part of the house.
Step 5: Decide What You Can DIY (And What You Shouldn’t)
Labor is a major part of your build cost. If you’ve got skills or friends/family who do, you can save big by taking on:
Painting interior walls
Installing trim and doors (if you’re handy and patient)
Installing flooring in bedrooms or bonus areas
Building simple decks or small porches
Where you usually want pros:
Foundation and concrete work
Framing and structural work
Roofing and metal installation
Electrical and plumbing
A lot of people think DIY means building the whole thing themselves. It doesn’t.
DIY the finish line, not the structural skeleton.
That way you protect your home’s quality and safety while still saving thousands on the final details.
Step 6: Shell-First Mindset
One of the best strategies for a tight budget:
Get the shell right. Protect yourself from weather. Finish the beauty over time if needed.
A shell-focused approach prioritizes:
Structure, roof, and dried-in exterior
Doors and windows installed correctly
Weather-tight, insulated shell
Once your barndominium is dried in, it becomes much easier to:
Slowly upgrade finishes as funds allow
Add built-ins, nicer cabinets, upgraded counters over time
Finish bonus spaces later (like a future loft or spare room)
Many Buckeye Plans clients use this phased build idea—get into a clean, simple finished interior first, then layer on the fancy stuff as life and cash flow allow. Contact Buckeye Plans if you need assistance building the shell.
Step 7: Be Honest About Your Local Market
A $250k barndominium in rural Mississippi is a very different equation than a $250k barndominium in coastal Florida or the mountain West.
Things that affect cost:
Local labor rates
Material availability
How strict your county is (engineering, inspections, permits)
Site prep: is your lot flat and ready, or are you carving into a hillside?
What stays the same everywhere:
Simple shapes are cheaper
Smaller footprints are cheaper
Less roof complexity = less money
Big glass walls, tall walls, and crazy spans cost more no matter where you are
This is where good plans pay off: when your layout is efficient, your square footage works harder for you.
Step 8: Work Backward From Your Budget, Not Forward From Your Dream
When someone starts with “We want 3,500 sq ft, a 40x60 shop, wrap-around porch, huge kitchen, and we have $250k,” the honest answer is:
“We either need to raise the budget or shrink the design.”
A better path:
Decide your max budget (ex: $250k)
Use a realistic cost per sq ft range for your area (say $170–$190)
Back into the target square footage from there
Choose or design a plan that fits that target
That’s exactly where a barndominium-focused designer or plan company helps—they know how to squeeze a lot of life into a compact, efficient footprint.
How Buckeye Plans Fits Into This
If you’re serious about a barndominium under $250k, here’s how working with a design team like Buckeye Plans can help:
We can suggest plans that are naturally budget-friendly (simple shapes, efficient layouts)
We help you avoid expensive structural choices that don’t match your budget
We can tailor stock plans or create custom layouts that keep your square footage and structure in line with your goals
We can build plans that are ready for material pricing and, in many states, engineering/permit requirements
A good plan set doesn’t just tell the builder what to build—it protects your budget before the first shovel hits the dirt.
Final Thoughts: Cozy Beats Massive When You’re Under $250K
You don’t have to give up the dream of a barndominium just because you’re not spending $400k–$600k.
You might not get:
A massive shop on day one
4,000 sq ft of heated space
Every upgrade under the sun
But you can have:
A smart, efficient 1,300–1,700 sq ft barndo
2–3 bedrooms, 2 baths, and a big open living/kitchen
A small garage now, with room for a bigger shop later
A home on your own land, built around your life instead of someone else’s idea of “perfect”